DISCOVERY / A Journey Through Star Trek - Part 3
- Fausto Tejeda
- Jul 23, 2024
- 4 min read

creativedirection
This has been and continues to be my favorite environment that we have created. It presented a variety of challenges that needed to be addressed, starting with time constraints. Due to constraints in the schedule, we only had 10-11 weeks to finish this environment, instead of the usual 14-16 weeks. It's usually in the last 2-3 weeks of the process where we have the biggest visual improvements, as everything comes together. We informed Production, and they fully supported us with managing and limiting creative feedback and allowing us to focus on the work. The collaboration on this environment was highly successful and resulted in one of our most accomplished projects to date. We had to develop two distinct sections of the ship, the ShuttleBay and the Bridge, both of which required a vast amount of detailed elements to achieve a photorealistic appearance.
technicalspecs
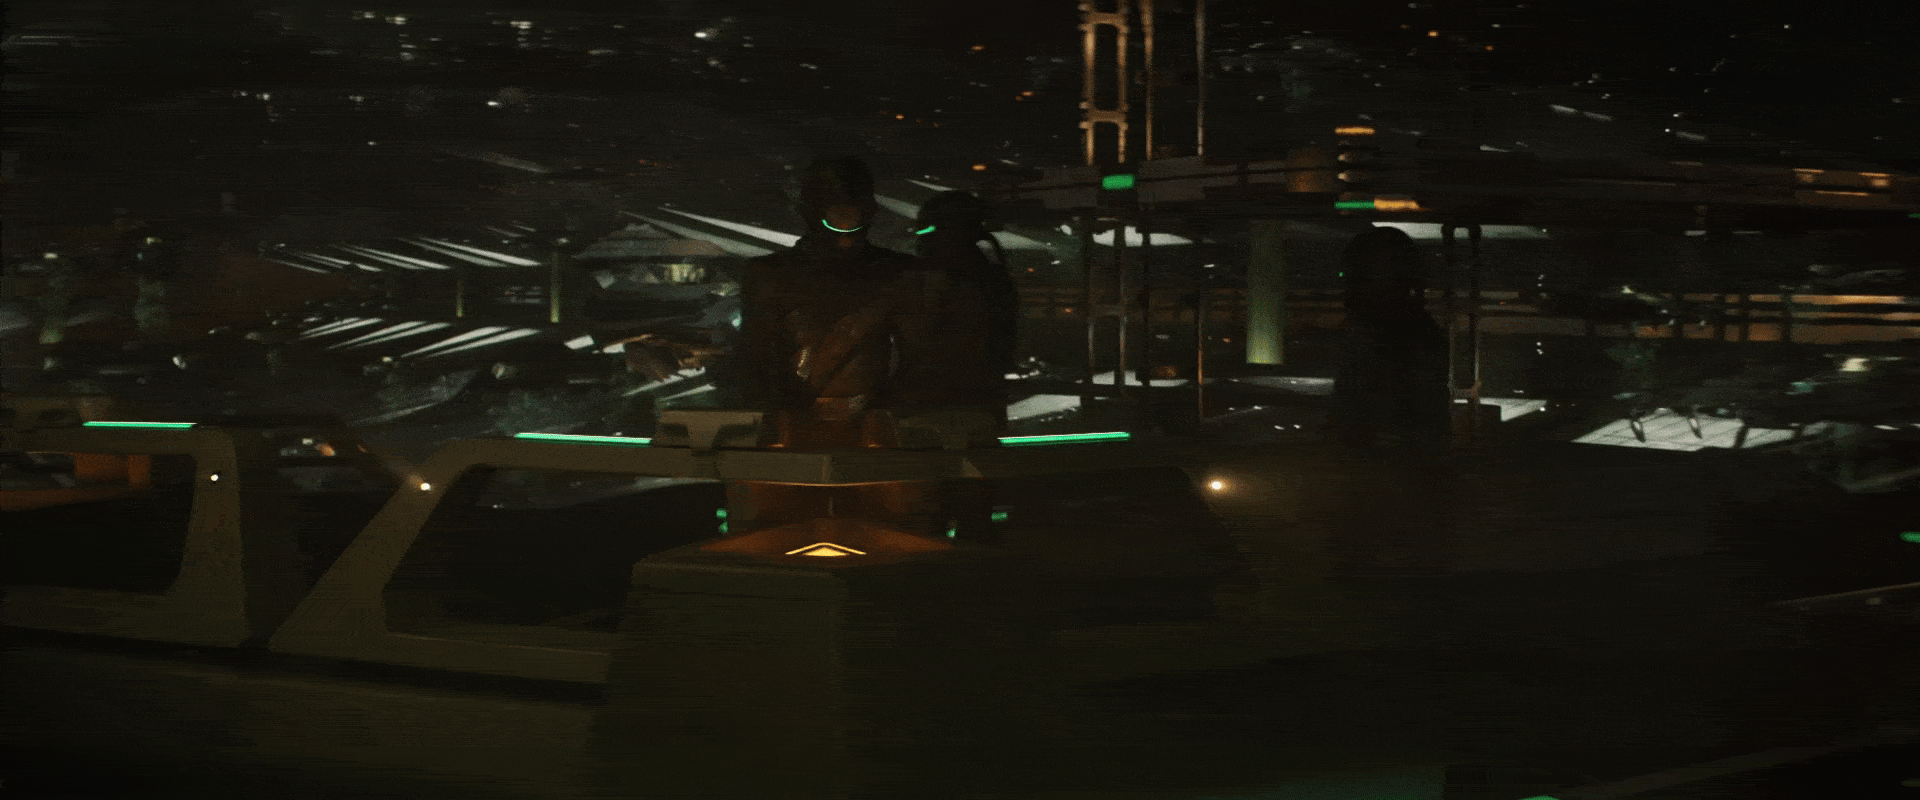
The Breen ship environment spans an impressive 6.2 km in length and 1.13 km in width, totaling 7 sq. km of meticulously crafted details.
We had a total of 380 ships, over 360 guards (comprised of 2D flipbooks and 3D digi doubles).
1 DMP Starfield, 2 DMP Nebulas (with control for color, brightness, and twinkle).
A staggering 108 million polygons distributed across 7,500 meshes, totaling of 32 GB of data.
All done in Unreal Engine 5.1

technicalfacts

Photogrammetry was used to capture the guard, along with crates and other props, to create digital versions. These were then used throughout our environment, matching some of the practical elements on set.
The Art Department was a great resource throughout the entire process. They provided us with a base UE file of the environment, which they used for concepting, and this was our starting point. At this stage, we proceed to do another round of internal concepts to guide our team and continue to improve and refine the asset.
scale
With a total length of 6.2km and an open design, we needed to incorporate several elements to emphasize the vastness of the ship. This involved the placement of numerous crates, palettes, platforms, ships, characters, and and atmospheric elements. Additionally, the crates and floors were built with contorl over brightness and cadence of their lights, to suit the different lighting configurations. Multiple configurations of the crates and palettes were constructed to correspond with different practical arrangements. This flexibility enabled swift toggling of visibility based on the shooting requirements.
An essential component that significantly contributed to portraying the ship's scale was out infamous City Lights Pass. This is implemented as a decal in UE, and consisted of a scaled-down city lights picture/texture. These decals were strategically positioned across the roof, side walls, and occasionally adjusted on a per shot basis. The City Lights pass served as a finishing touch and remains a personal favorite for enhancing environments that can make use of it.
Incorporating intricate details into the model is crucial for conveying scale effectively. However, a common issue with small asset details in Virtual Production is they cause flickering, particularly when numerous small objects are placed closely together. To address this challenge, we usually convert some of these models into textures, which is highly successful for distant elements or flat structures like grates and vents.

guards
This was the first time in which we had to implement crowds at such a large scale. Guards were placed thruoughout the entire environment, moving and engaging with each other. But, they also had to respond to director cues and perform specific actions. With our previous experience using flipbooks in Q’Mau, we knew this would be one viable solution. We set up a shoot on the Volume (with the wall set to the perfect keyable blue), with an actor in costume, and had him perform all the necessary actions. Simultaneously, we scanned and built a cg version of the guard. We placed 100’s of these guard elements throughout the environment as flipbooks, mixing single and double guard elements to make them seem like they were talking to each other. For the Bridge area of the ship, we needed the guards to stomp their weapons on cue, so we used a system in UE which would quickly cycle through the flipbook animations.
We also did a mocap session of different actions that were then retargeted to our CG version of the guard. In UE, we combined different animation clips so we would have a variety of animations that we could cycle through and give even more life to the guards.

ships
We needed to have both moving and static ships, at varying distances. We built 3 different ships, and scattered hundreds of those throughout. We had one hero ship in the bridge by one platform, and a few others close by.
For the animated ships, we wanted them in specific areas with specific trajectories, so we simply used curves as paths and attached our ships to them.
To create the illusion of distant traffic, we pre-rendered some small, moving light shapes, and put those on flipbooks which we then scattered throughout the environment. This was key in establishing scale and worked incredibly well. During the blend and on the shoot day, we would duplicate and move these around as needed to make a shot look better.

atmos
This is one of the key elements we add to practically every environment. It’s a cheap (performance wise) way to add life and depth to an environment. We needed steam, smoke, sparks all interacting with the ships and platforms. We ended up using footage elements of falling steam all across the top of the floating platforms, and some rising steam coming from the floor vents. We also placed varied different steam elements underneath each of the parked ships, to make them more believable.

exterior
Different exteriors were created to match different sequences. We used 1 starfield DMP, and different colored Nebulas that we could then turn on and off as needed.


Comments